Hello, Welcome to my Blogger Dai Blog!
If you want to learn how to start a blog in 2023 then you are at the right place. In this article you’ll get every micro detail about starting a blog and after completing this simple step-by-step guide you can start your own blog and start your journey make money online.
One last thing, I want every reader of this post to be successful with its blog. So if at any point you need help then feel free to contacts us immediately. I am always ready to help my readers and I reply to every message, personally!
Ok, Let’s start learning about creating your blog now!
When I started blogging, I made a lot of mistakes. It took me a lot of time to learn the stuff but now I have a ton of knowledge about creating and monetizing blogs. Here, you’ll get advantage of my years of my blogging experience and knowledge so you won’t make the same mistakes that I made.
When you want to start a blog, you need to collect information from different websites and every website tells you a different story which is very confusing. To save your time and efforts, I have created this step-by-step guide that will teach you EVERYTHING about starting a blog in 5 easy steps.
Step #1: Find Your Niche (Blog Idea)
Niche selection is the first step to starting a blog. You should pick only that topic for your blog, that you have little bit knowledge or you are the most interested in.
The first element in niche selection is your passion & interest. you should have a high interest in the topic you are going to write about in your blog.
The second element is the size of the niche because only passion is not enough. Your niche must have a huge audience interest also. If there is no audience then you won’t get any visitor on your blog. There must a good number of people searching for the topic you are writing about.
The third element is the feasibility of monetization. I call it ‘Monetization Potential‘. If your blog doesn’t have the potential to monetize then you won’t be able to generate any income some of the niches have high readers and have high monetization potentials.
So, your niche must have these three elements or simply pass these three tests:
- Your passion or interest
- Size of the niche
- Monetization Potential
To get in-depth information on how to do these three tests, i recommend you read our detailed guide on finding your niche for starting a blog. In this guide, you will learn how to use tools and software to do these three tests and choose your niche.
You Must Read: 3 Easy Steps To Find Your Niche To Start A Blog
Step #2: Choose a domain name
After you finalized your niche you can think about the name of your blog and choose a domain name for your blog. I know you are now thinking what is domain?
A domain name is simply the address of your blog. For example, my domain name is bloggerdai.com. It is also called the URL of the blog. Anyone who knows your domain name, can simply visit your website by entering the URL into the address bar.
You must keep the following points in mind while deciding upon the domain name for your blog.
- It should go with your niche and idea.
- It should be short, memorable and easy to pronounce.
- It should give you the freedom to expand your blog later on.
- It should look good when you type it as a URL.
- It should match the style of your writing and your audience.
But it doesn’t mean that you can buy any domain name you want. Before you buy the domain name it must be available. That means, no one already purchase that domain. If someone has already purchased your desired domain name then you need to think about a different domain name.
Checking availability of Domain name
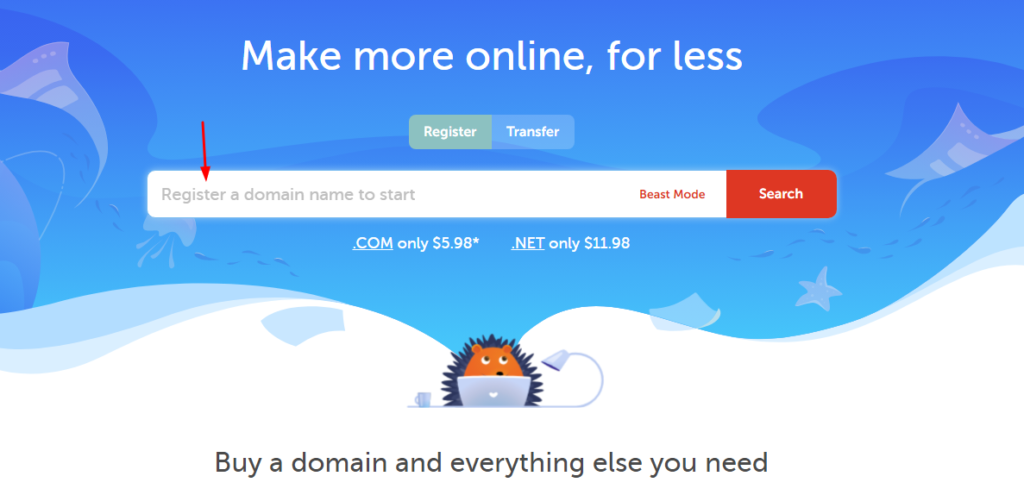
To check if your domain name is available or not, you can simply visit namecheap.com. Simply enter your domain name there and check if it is available or not. If your desired domain name is not available then you’ll see the following message.
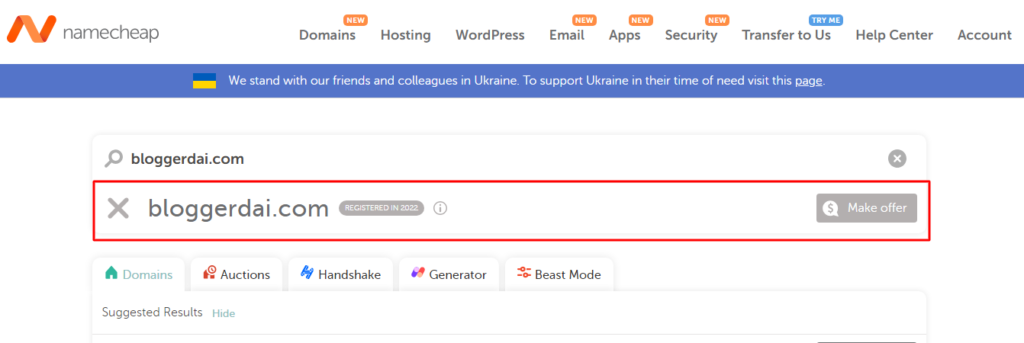
Now, you need to think about a new domain name or make little variations in domain name. But don’t waste too much time in thinking about a domain name. I’ve seen that people waste many days or even weeks in thinking about a domain name. I never spend more than few minutes to come up with a great domain name.
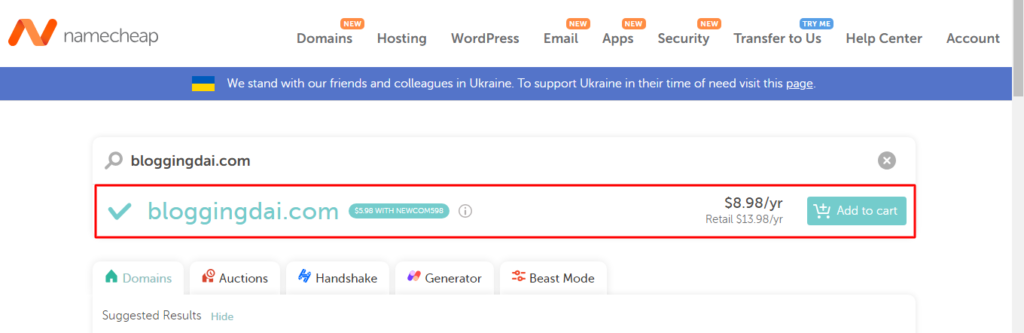
In case you can’t think a domain name, then simply Contact me. I will help you registered a great domain name for your blog. When you enter a domain name which is available and haven’t bought by someone yet, then you’ll see the following message on your screen.
Step #3: Buy a web hosting service
A web hosting service is required to store your blog files on the internet. It is a place where all of the files of your blog will be stored so that they can be accessed by anyone from any all over the world. So start a blog you need both i.e. a domain name and a web hosting service.
Choosing a right web hosting service is very much crucial for starting a successful blog. There are so many web-hosting services providers are there on the internet, but I recommend you use Name cheap web hosting. But why?
I recommend Namecheap due to the following reasons:
- I use Namecheap for myself: I use Namecheap from last 3 years and they are simply awesome. I host many websites on this hosting provider.
- Top-notch customer service: They provide 24×7 online customer service. They are real professionals and they know how to solve customer’s problem.
- Free Domain Name: They not only provide World’s no. 1 hosting service but they also provide you a free domain name with every hosting plan. You can save minimum $15 on a domain name when you buy their hosting.
- Economical Pricing: They offer you great pricing. It is just $2.98/month (billed for one year). Trust me, if we talk about the cost, then this is nothing for what you are getting. They offer you a completely FREE domain name which is itself worth of $15.
- Money back Guarantee: They offer you full 30-days money back guarantee. But I am sure, you won’t ask for it. because their service is simply great!

I strongly recommend Namecheap, not because I use them but because they have a best web hosting service in the world. To buy a domain name and web-hosting on namecheap.com website, simply visit their website. If recommend you to go with stellar plus plan as beginner.
Simply choose ‘stellar plus’ plan and click on Get Started. As a beginner this plan is more than enough for you.
On the next window, you’ll be asked to enter your domain name. Simply enter a domain name that you’ve already decided.
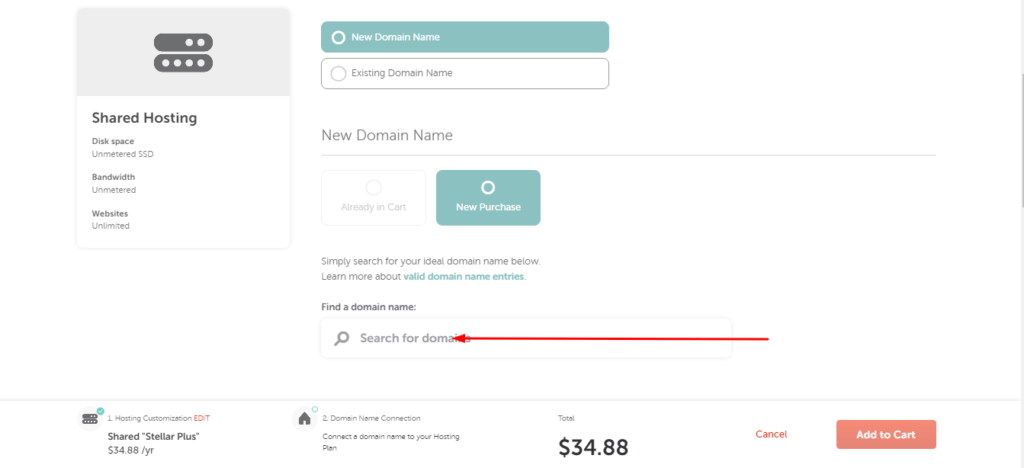
After choosing domain simple simple click on connect domain to hosting button. With this hosting you can only choose those domain that price show $0. If you want to choose .com domain then you need to pay a little bit extra amount of $6 only.
After this simple click on Add to Cart button. on the next screen you will see the details of your domain and hosting and choosing your billing cycles. Simple click on Confirm Order Button to go on next screen.
Note: If you not registered already on Namecheap website then you will the registration option. simple register youself before continue purchasing. If you are already registered then you will see screen where you will be asked to enter Billing Info and price will be the minimum i.e. just $2.98/month.
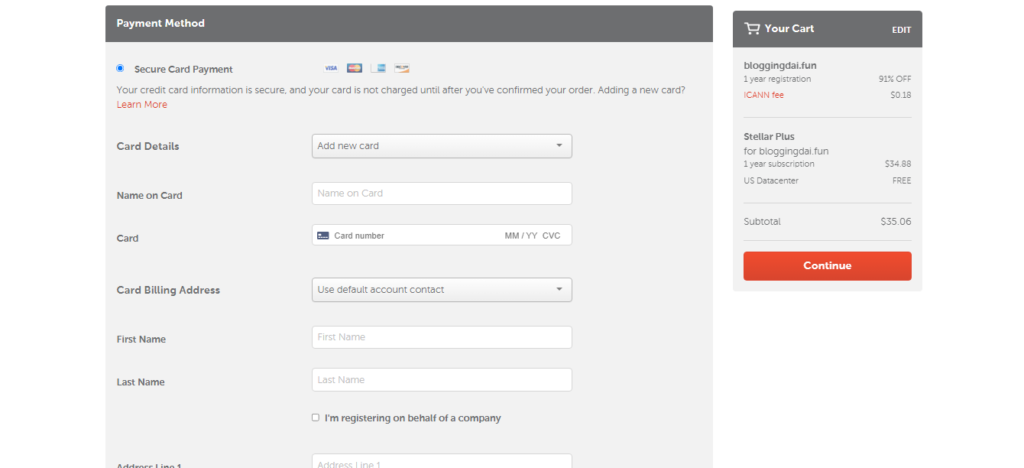
Did you notice?
Your total cost for starting a blog including Domain and Hosting for one year is just $35.06.
Now, tell me just one thing, which business in the world can be started at such a low cost? Actually, starting a blog with namecheap is simply awesome! You get top-notch service along with great offers!
If you want to pay via PayPal, then simply click ‘Other payment options. It will show you Payment via PayPal option also.
GREAT NEWS:
If you are from Pakistan and want to start blogging, then i recommend you Pakchamp hosting provider. Here you can start blogging in just Rs: 4200 rupee for one year. This plan include free .com domain and basic shared hosting plan.
>> Start Your Blog With BlueHost Now <<
Step #4: Installing WordPress
WordPress is a content management system that allow you to write, format and publish content on your blog. This is the most popular platform to create a blog. There are other alternatives also like Blogger and SquareSpace but WordPress is the most powerful with so many customization features and easy to use. Mostly popular websites are using wordpress nowadays.
I will choose WordPress. Because this platform and easy for me and also for you. When you buy web hosting service from them, they provide you a cpanel where you manager and control your website easily.
Some of the companies like Bluehost and other automatically install wordpress on your domain and hosting. But here we well learn how to install wordpress on your domain manually.
Login to your account and click on cpanel. i recommend you to watch below video to get easy help in installation.
Congratulation! Now your blog has been launched!
You can simply type your domain name (i.e. URL) into your browser and see how does it look. To visit your WordPress dashboard simply visit yourblogurl.com/wp-admin to access your WordPress dashboard.
Step #5: Choose a theme and add plugins
After entering your WordPress dashboard the first thing you need to do is to choose design and the layout. To do this, you can select a theme. Now its depends on you to choose free theme or paid.
If you want to see free themes then simply go to Appearance – > Themes and select a theme of your choice. I recommend you choose GeneratePress theme, because this theme is free and best for blogs. I also use this theme on my every blogs.
WordPress gives you a lot of customization options to change the design and layout of your blog. To make further changes in your blog, simply go to Appearance – > Customize option and you can make all the necessary changes over there.
Here I add a short video about the best customization guide of GeneratePress theme to setup your blog. Simple follow all steps that are shown in below video and customize your blog as per your requirements.
This tutorial is in Hindi language by web insights YouTube channel. If you don’t know Hindi or Urdu language then just open CC option for subtitles and follow the steps.
After making all the settings etc. now you need to install few plugins. A plugin is simply a tools that enhance the functionality of your blog.
# Which Plugins to Install and How?
After logging into your Wordperss blog, simply click ‘Plugins’ and then on ‘Add New’ and search the below mentioned plugins and install them one by one. You can install them in just few clicks.
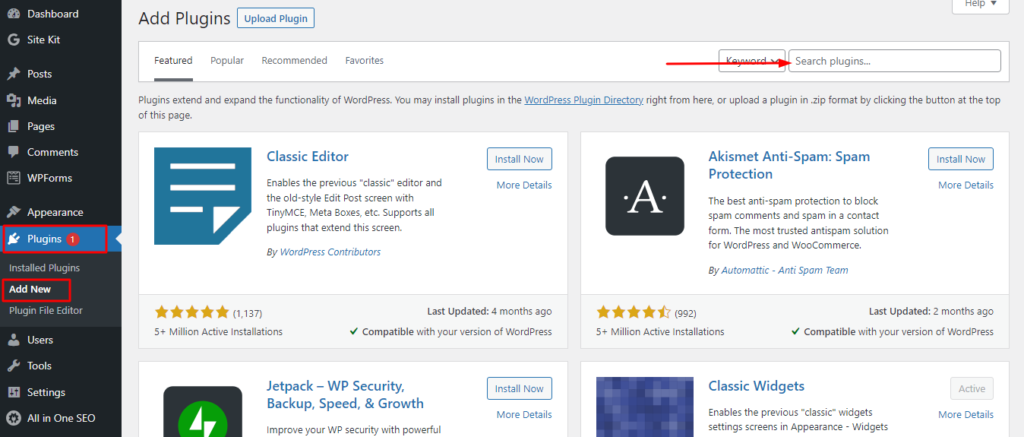
Here are the few plugins that you must install:
- Jetpack– This plugin enhances the security and performance of your website. Along with the security features Jetpack also provides social media features and analyze visitors data.
- Free WP Forms – This plugin helps your audience to contact you and further help you to increase lead generation.
- Akismet: This is basically a moderation tool. It checks comments and contact form submissions to prevent spam.
- All in one SEO: It is a great tool for SEO – Search Engine Optimization. It helps you optimize your post content or website to rank on Search Engines.
- WP Super Cache: It improves the load time of your blog and provides the required data to your visitors at a greater speed.
- Contextual Related Posts: It helps you show ‘Related Posts’ on your blog and keep the user engaged on your blog.
Step #6: Create and Publish content for blog
Now, it is time to create some important pages. To add a page to your blog simply click Pages – > Add new in your WordPress dashboard. Remember, we are not talking about the posts, we are talking about the pages and they are different from posts.
There are some required pages that help your visitors and also help in monetization approval. You need (About us, Contacts us, Terms and condition, Privacy policy) pages. Now here is a good news for you. You can create these pages by using our free online tools.
Simple provide information of your website and generate pages. After page generating. Copy the Html code and paste it on your blog page section.
You can create as many pages as you feel necessary. There is no limit on the number of pages you can create in WordPress.
Publish your first post
In the same way, you can add a new post also. To write and publish your first post, simply go to Posts – > Add new.
Simply enter your title and the content. You can add images, do formatting and create columns etc. to make the content appear the way you want. After writing all the details, simply hit ‘Publish’ button!
Congratulation! Your first post is published on your blog.
Step #7: Optimize your blog content for better search engines rankings (SEO Process)
When you write something on your blog, you must want that user find your website and visit. With the help of this process you get quality and highly targeted traffic from search engines. But to get traffic from search engines like Google or Bing, you need to optimize your blog content. So that search engines can find, like and display your content in front of the people who are searching for.
Optimizing your blog/website/content for search engines is called Search Engine Optimization. SEO is a very broad topic and it is not possible to cover it here but here I would like to give you some important point.
To start with SEO, you must keep in mind following important things:
- Title of your post: Your title must be very catchy and must contain the keyword you want to rank for. For example, my this post is ranking for the keyword ‘how to start a blog’ and you will notice that I’ve included it in my Title tag.
- Meta tag or Description: Description mean a little summary that a user see in search engine while seeing search results.
There are many plugins that help you do SEO work for you. I use AISEO plugin that i already mentioned in plugin installation section. AISEO is the best SEO plugin and comes with a lot of features that make your SEO work easy for you.
To know more about this plugin simple message me i will share more detail about this. Now we are at the last stage.
How To Promote Blog?
There are a lot of things that help you o promote your blog. You can promote your blog on by using below information:
- Promote on social media: You can share your article on social media sites like Facebok, Twitter and Linkedin etc.
- Promote among your friends and relatives: Tell your friends and relatives about your blog via WhatsApp, Telelgram and other social media platforms. Ask them to share your blog URL with their friends.
- Promote on other forums and networking sites: Be part of other communities. Post on other forums and put your blog URL in your signatures. If you post useful content on forums, then people will definitely take your seriously and they may subscribe to your blog also.
- Promote through paid advertisement: You can promote your blog via paid advertisement also on Google, Bing Ads, Facebook and Twitter etc. (as a beginner i not recommend this option)
- Organic Traffic from Search Engines: If you write regularly and useful content then search engines will give you site better rankings. You will get a lot of traffic from search engines and your blog will grow in a natural way. (Focus on this option)
Great! You’ve learned how to start a blog.
Now, you have your very own domain name, hosting account and your blog is ready. You can become a successful blogger by writing useful content regularly by doing proper research. Always give value to your readers so that they read your blog more frequently.
Write for your visitors not for the search engines. If you do proper research on a topic and then share your knowledge with others in a natural way, then people will definitely like you and your blog will grow.
Remember, it is not an overnight process. It will take some time may be some weeks or even months, but the results would be really awesome! All the best!
Have questions? Feel free to contact me. I will reply to your message personally.
